Sharing file or folder on the network:
Any computer in a windows network workgroup can do share file and folder. File and printer sharing on a computer must be configured. This functionality was set up when the network card was installed. Therefore, already file or folders can be shared that has use on other computers. To share a file, these steps were followed:
1. Locate a folder on the computer.
2. Right-click the file that you want to share, and then click Sharing and Security to view additional settings.
3. The next two windows only appear when you are setting up your first shared item. Windows notifies you that sharing data presents a certain security risk. Therefore, remote access is turned off by default. Click the Security warning message, click Just enable file sharing, and then click OK
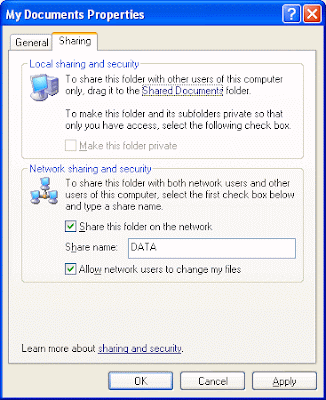
4. Now you can share data. Click Share this folder on the network, and then type a share name. You can use this name later to access the data. The share name and the folder name do not have to be the same.

5. Specify whether the data that is accessed over the network can be changed, and then click
Ok.The icon for the shared folder appears with a picture of a hand
Accessing Shared Content:

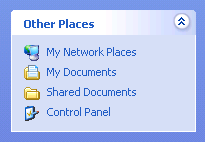
To access the shared folder, click Start, click My Computer, and then click My Network Places. You can access the shared folder in the following ways:
- Directly on the top level
- Hierarchically on the computer level
When you open My Network Places, the shared resources for all the computers in your small network are listed next to each other. You can find the required folder under
Share_name on
Computer_name.
On a specific computer in the network, will see only the shared resources on this one computer. Click View workgroup computers, double-click the computer names (either as Computer_name or as Computer_description [Computer name]), and then explore for the name of the shared file.
By clicking Allow network users to change my files, let user view, copy, move, change and delete files in this folder on any computer in this network.
You can use the same method to share whole drives, including the following drives:
- Hard disks or partitions
- CD ROM drives
- ZIP drives
To stop sharing, right-click the file that is shared, click Sharing and Security, and then clear the Share this folder on the network check box. When you do so, this resource no longer appears under this computer name. However, the folder link directly in the network environment remains. It is no longer available unless you set it up for sharing again. When a user tries to access the folder, they receive a "No access" message.


